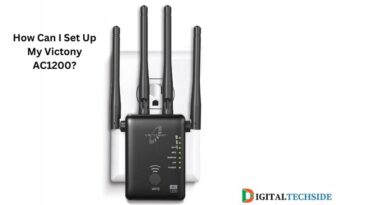
Setup OYFNZI WiFi Range Extender with Fritz 7490
A WiFi range extender or signal booster helps you extend the WiFi range of your router. It is useful for big houses and offices where you want to extend the WiFi range of your router or access point. In this article, we will learn the setup and installation of the OYFNZI WiFi extender using our phone or computer in just 2 minutes with our Fritz Box.
So to start with, first make sure you have working internet at home. If you haven’t yet set up the router or your access point, then we recommend that you do so first. Only then will you be able to set this repeater. The repeater needs a WiFi host to extend its signals.
So to begin the Fritz Box login, follow the below steps first.
Fritz Box Login
- First and foremost, you will need to plug the Fritz Box router into a power outlet.
- After you have a stable power LED on it, connect the internet cable to your router. Now, depending on your connection type, you will have to connect the Ethernet cable, fiber optic cable, etc to your router from your Internet service provider.
- Now for fritzbox 7490 login, you will have to grab a phone or computer, tap on the WiFi icon, and go to the WiFi settings.
- There, you will find the Fritz router box SSID showing up. It will come up as Fritz!Box_7490_XXX. Tap on this network to connect to it.
- Once connected, open a browser and type “fritz.box” into the URL or address bar. Type “fritz.box” to login to the setup page. If the login page is not coming for you, then try the default ip address of the Fritz box, which is 192.168.178.1 and hit enter.
- It will also take you to the setup page of the Fritz box.
- There, you will have to create an SSID and password for your router and then hit save settings. Moreover, during setup, if it asks for the login password, you can have a look at the bottom of the router. There, you will find the default login password.
- After the setup is done, we can go ahead and start with the OYFNZI setup.
So, the OYFNZI extender can be setup in two modes, namely AP and Repeater.
OYFNZI Setup
- First and foremost, we recommend you plug the extender into the same room as the router. Also, don’t plug the extender too far from the router.
- Once you have a stable power LED on the extender, use your phone or computer to go to the WiFi settings.
- There you will find the OYFNZI WiFi extender network default SSID, which is WiFi_2.4ghz_XXX or WiFi_5ghz_XXX. Tap on this network to connect to it.
- Once connected, the setup window will pop up automatically on the screen.
- There, you will have to simply select the network name that you want to extend and type its password for verification.
- So here you need to select the SSID of the fritzbox 7490 login and type its password too.
- Once you save settings, the extender will reboot, and you will be able to find the extender’s SSID with the “Pro” suffix in your WiFi list.
Method 2
- In this method, plug the extender in the same room or in close proximity to the router.
- Next, you will have to press the WPS button on the extender. You can find this button on the right side of the extender.
- Within 2 minutes, press the WPS button on the router. You will find the blinking light on both the extender and the router.
- The light will stop blinking after 30 seconds, and you will have a solid WiFi LED on the extender.
- Again, you will be able to see your newly setup extender network in your WiFi list with the “Pro” suffix.
Conclusion
So, this is how you can connect the OYFNZI WiFi extender to the Fritz router. If you are not able to set up this extender, then we recommend you reset it. You can do that by holding a paper clip inside the reset hole of the extender for around 10 seconds while the extender is still plugged into the wall.
After this, the extender will reboot, and then you can go ahead and try the setup again.

As a DIGITALTECHSIDE author, the majority of our articles have been focused on technology, blogging, business, lifestyle, social media, web design and development, e-commerce, money, health, education, entertainment, SEO, travel, and sports.
Contact us at digitaltechside@gmail.com if you have questions of anything.


